Originally published on January 2, 2014
This was one of those recipes that was born from necessity. I didn’t have any bread in the house, but I needed something for the girls’ lunches – and there was no time to go shopping to pick up more. I could have just made my go-to sourdough bread, but why not try my hand at wraps if I’m actually going to make something? After all, I love new things to try in the kitchen, and I love a challenge. Turns out, I only got one of those with these, as they were super easy to make! The recipe I used said that if you’re “not used to making these,” you should have two people – one to cook them while one rolls the other out. Well, it was me by my lonesome, but I thought, ‘Really? Do I need two people?’ Nope! Just start by rolling a couple out so they’re ready to hit that pan, and then continue rolling as you go. If you do think you’re getting behind, just move the pan off the heat so the dough doesn’t burn as soon as it hits. Trust me, the cast iron (and yes, you really should use a cast-iron) will still be piping hot for the minute it will take you to roll out more.
Ingredients:
3 cups all-purpose flour
2 teaspoons baking powder
1 teaspoon salt
4 – 6 tablespoons lard or vegetable shortening
1 1/4 cups warm water (approximately)
Directions:
1.) In a food processor blend together the flour, baking powder, and salt. Blend until the ingredients are just combined and then remove the lid and pinch some together with your fingertips. If the ingredients hold their shape when squeezed slightly, it’s perfect. If the mixture crumbles even after pinching, you either don’t have enough shortening or it’s not mixed together well. If it forms a hard clump, you need less shortening – it’s really hard to get out of there though, so just add a bit more flour to fix the ratio.
2.) Replace the lid onto the processor and then add the water all at once. Mix the dough quickly once the water has been added.
3.) Dump the contents of the processor into a large bowl, moving it around the sides of the processor to pick up any excess flour as you do. Once in the bowl, knead it by folding it and pushing it down, and then folding again about twelve times, or until the dough is soft and no longer sticky.
4.) Cover the bowl and allow it to rest for about 10 minutes. This step is important, as it will let any excess flour absorb back into the dough, which will give you a softer tortilla after cooking.
5.) Once your dough has rested, begin pinching off small balls that are about 1 inch in diameter. Knead each of these balls just by placing them in one palm, folding it over with your fingers, and repeating until it’s in the shape of a flat disk. Place it to one side of the bowl, or on a generously floured surface and repeat with the remaining dough.
6.) When the entire large bowl of dough has been pinched off into smaller balls, cover the small balls with a tea towel and allow to rest for another 10 minutes. This will make them easier to roll.
7.) On a well-floured surface, roll out the small balls into tortillas. To keep a round shape, roll once, turn 1/4 of a turn, roll again, and repeat until the entire ball has been rolled. Don’t worry if they’re not completely round; homemade often means rustic-looking, after all!
8.) Heat a cast iron skillet on top of the stove at medium-high heat. Let it get really piping hot! Lightly drizzle a bit of canola oil over it and wipe the surface thoroughly with a paper towel so they don’t stick.
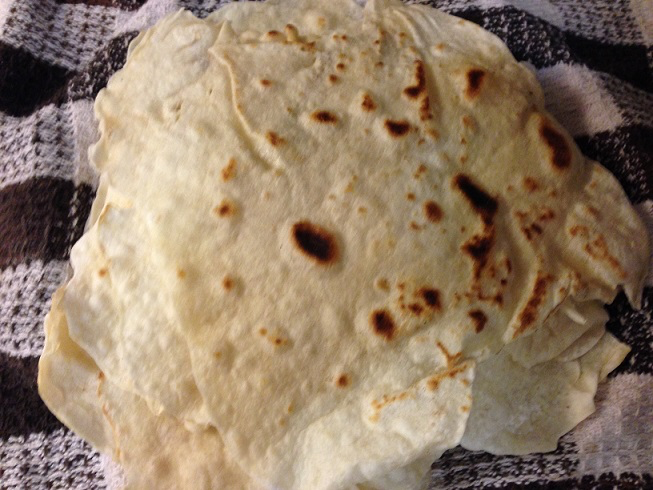
9.) Place one rolled tortilla onto the cast iron skillet and cook for just about 30 seconds. Don’t let it burn or you’ll have to wash the skillet and start all over again. Admire the beauty of it as it puffs up and starts to become a bona fide tortilla right before your eyes! Then flip and cook for another 30 seconds.
10.) When one tortilla is finished cooking, remove it from the heat right away and wrap it in a tea towel to keep warm. Start cooking another tortilla, placing it right on top of the other when other and re-wrapping in the towel. Don’t worry about the finished tortillas sticking to each other like I did – they won’t!
11.) Serve as soft tacos, sandwich wraps, tortilla chips (when fried,) or anything else you’d like, and enjoy!